


software
Lubyk the library
The library consists of many objects and open source libraries carefully selected and adapted to work together in a seamless way. Objects can be directly used in Lua scripts by requiring ‘lubyk’.
Mimas the editor
Mimas is the graphical interface to work with Lubyk “nodes” (Lua scripts that wrap some functionality) in a graphical way to compose larger projects (eventually across the network). The editor is built with the library.
-
Documentation generator and refactoring
In order to move forward with lubyk project and announce some nice tools that we created for a recent show, we need to start writing some good documentation and cleanup some code.
Documentation generator
The specifications for the documentation tool were:
- Generate documentation from source code.
- Support literate programing for tutorial style source files.
- Support latex math.
- Parse function names even if there is no comment.
- Produce documentation in the same order as the content of the source file (with sub-titles, sections, etc).
- Good navigation support across classes, functions and modules.
- Parse any lua file (does not depend on naming conventions) and create simple to link html pages.
After playing with a simple state machine to parse lua code, some real world documentation and many improvements, the generator is finished and works fine with source files adapted for it.
All documentation for lubyk now lives at:
Lubyk documentation: doc.lubyk.org
Some well documented files include test.Suite, lk.Doc and part of the upcoming graphics and geometry library “lug”: lug.V2.
All documentation is generated with lk.Doc by parsing the sources.
Refactoring
To avoid complex inter-modules dependencies and weird surprises in the long run, we are splitting “lk” into several modules and creating a core graphics and geometry compatibility module to hold things like vectors, buffers and such. Here are the new modules with their purpose:
lub
lub = lubyk base
This will be the core library. The one dealing with low level scheduling, threads, package management and memory. It replaces “lk”.
Important things that should go in “lub” :
- Scheduler (should not depend on zmq)
- Doc
- Test
- Timer
- Thread
- TimeRef
- Finalizer
- C++ only:
- Fifo
- Mutex
- msgpack
As “Doc” and “Test” would depend on lubyk utilities and filesystem, we need to have those in “lub” too. The idea is that lub depends on nothing else (remove lfs dependency if possible).
So “lub” also contains:
Lubyk filesystem and path handling functions, file stat and script introspection.
Some utilities related to “string” and “table” such as split, join, insertSorted, etc.
lun
lun = lubyk networking
Contains the classes used for networking such as:
- Socket
- WebServer
- DavServer
- Service
- ServiceBrowser
lup
lup = lubyk processing
Network transparency and plug & play layer.
- Morph
- Process
- Node
- Inlet
- Outlet
- etc
lug
lug = lubyk graphics and geometry
Contains core classes for vectors, quaternions, small matrices and buffers.
- V2, V3, V4
- M4
- Mem (C array)
- Raster (view on C array = matrix/image/vector)
Dependencies
These modules depend on each other in the following way (the arrow means “depends on” :
lub <- lut <- luf <- lun <- lup <- lug -
Bullet physics bindings
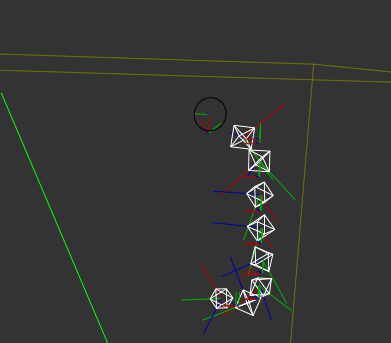
Just a quick note to say that I have a working bullet physics environment in lubyk. The bindings aren’t full yet (I am adding what I need as I go forward), but they work fine.
I also added the OpenGL based debugging code to ease experimenting without having to render the objects.
-
Ideas for physics with lubyk
What happens to the messaging connection model when we need to deal with tools like physical or rendering engines which need a more declarative approach ?
Ideally, I would like to be able to create a patch that looks like this:
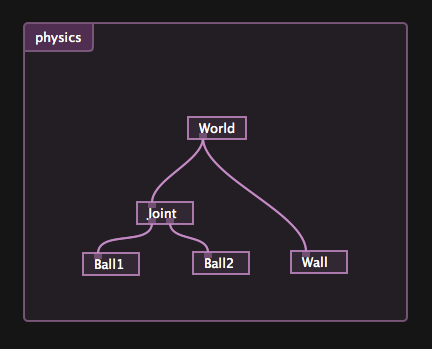
But this does not work with the current (late 2012) way slots work. Currently, links correspond to function calls without returned values.
In the case of a declarative setup where we want the links to model any type of relation between objects, we need to find some trick to make this work.
One simple and stupid solution is to have the “World” periodically call the objects below with itself as parameter. Each object would then register itself inside the world during the call. But there are obvious issues with this system:
- We have to deal with multiple registrations of the same objects
- Registration can be costly and should not be done unnecessarily.
- Removing a node would not remove the node from the World.
callbacks
What we basically need, is only a way for “World” to know if anything is added or removed, since after an object was added to the world, changing some aspect of the object does not matter because the addition created a direct, native connection (C++ or Lua) between the object (“Ball” for example) and the world.
The simplest solution I can think of would be for the ancestors to be notified when a child or grandchild is added or removed. We could imagine that the child has an “expose” function that would get called by ancestors.
The way it could work is as follows:
1. The user onnects "Ball1" to "Joint"
2. If "Ball1" does not have an "expose" table, stop here.
3. If "Joint" has a "connect" function, it is called with the "expose" table
   which should have a mandatory 'type' field. It is then up to the different needs
   of connected objects to decide what they want to do with this function call.
4. If the "connect" function does not return true, bubble up to the parent.
5. When a link is removed, the same happens with a "disconnect" function
   call.
For the “physics” engine above, the “childConnected” function call could look like this for the Joint object:
function connect(child)
  if child.type == 'physics.Object' then
    -- world was set the same way by the "World" object
    child:setWorld(world)
    -- connect the object to joint
    joint:AddObject(child.object)
    return true -- no need to bubble up
  end
end
The “disconnect” function would look like:
function disconnect(child)
  if child.type == 'physics.Object' then
    -- world was set the same way by the "World" object
    child:removeWorld(world)
    -- disconnect the object to joint
    joint:removeObject(child.object)
    return true -- no need to bubble up
  end
end
The same system could be used for all kinds of “connected” elements, like OpenGL Shaders on a rendering pipeline, etc.
-
Raspberry Pi live coding Lua
A couple of days ago, the Raspberry Pi was announced. Needless to say that this hardware is the perfect complement to the software provided by lubyk.
Raspberry Pi project
The goal is to create a debian based OS (eventually installed on sd-cards) to ease the adoption on lubyk (and Lua) as a scripting platform for RPi.
Why lubyk ?
Lubyk is a very good environment to program that removes most of the burden related to some difficult programming tasks, mainly:
- Build and installation (not needed with a scripting language).
- Boilerplate code to connect to hardware and such tasks (not needed by using the provided prototypes).
- Networking and configuration (not needed because lubyk transparently uses Zeroconf and ZeroMQ for networking).
- Control and parametrization (lubyk provides easy to use controls)
Why Raspberry Pi ?
Apart from its very low price, this hardware has some very good arguments to serve for educational, low-fi gaming and artistic needs:
- Very decent CPU (700Mhz ARM processor)
- Good GPU (supporting OpenGL ES 2.0, full hd and mpeg4 decoding)
- Small size (less then 9×6 cm)
- Networking (10/100 RJ45 ethernet)
- USB (two ports).
- Good IO (8 × GPIO, UART, I²C bus, SPI bus).
What now ?
Here is a list of the required steps to produce a first OS image:
- Port the linux-core to linux. [done 2012-03-07]
- Fix build to use native lua/luajit (remove the need for RTLD_GLOBAL). [done 2012-03-08]
- Fix build for to make it debian friendly (use debian libs, install location, etc).
- Build a debian installer.
- Compile for ARM.
- Create an empty debian OS with ARM target.
- Install and setup launch scripts for lubyk on the OS.
- Test, fix and repeat.
If anyone wants to join into this effort (or has special needs for what should be installed by default on the OS), please drop a line on the mailing-list.
2012-03-08 - comments (0) -
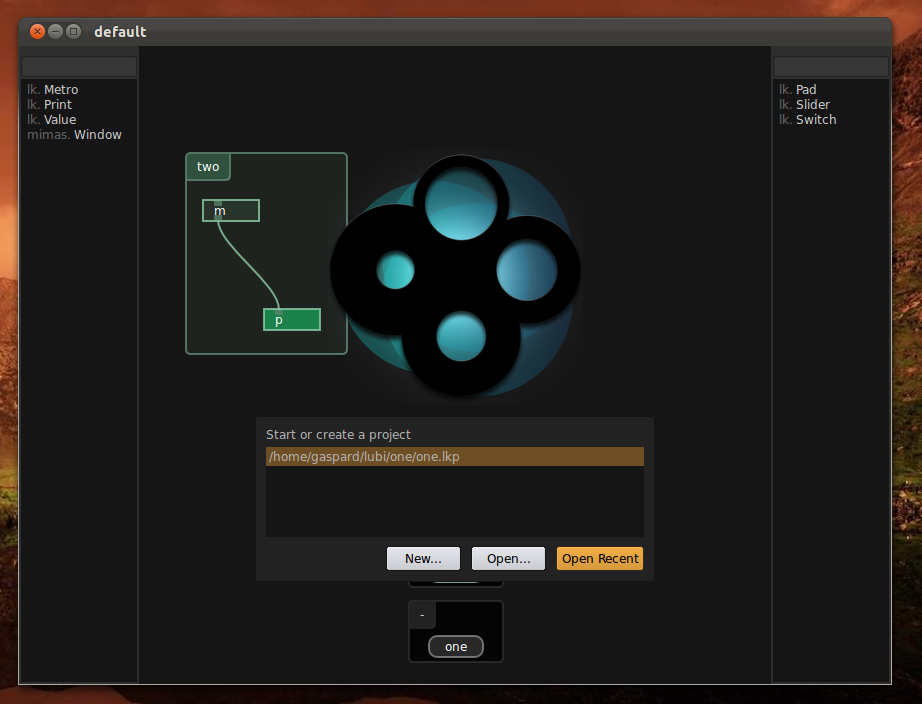
first run on linux
All required modules to run lubyk on linux now compile and I managed to open the editor:

First run of the editor on linux
As you can see, there are many bugs:
- missing host names
- morph server not shown
- a very rubato timer that reminds me of the first experiments with rubyk
- missing menus
- etc
But at least, the porting of mdns and other OS specific parts are well advanced and having something to see and play with will surely drive motivation !
2012-03-06 - comments (0) -
Connecting controls
This is just a short post to show what Lubyk currently looks like.
The big picture
This shows the important parts of the editor with a remote process showing a window (the green thing), the log window (right below), the patch view where nodes and processes are connected together and the control view on the right.
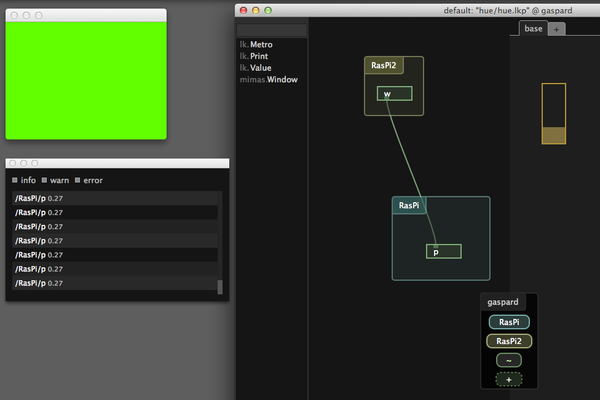
For those new to Lubyk, the nodes (the things called “w” or “p”) are boxes with inlets and outlets that simply execute a Lua script inside a remote process connected with ZeroMQ. By double clicking on a node, your favorite editor (vim here) opens the remote script (through WebDAV):

Full script of node “w”
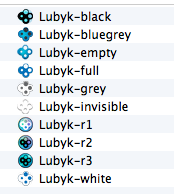
Parameters / controls
Declaring parameters in a Lua script is as easy as this:
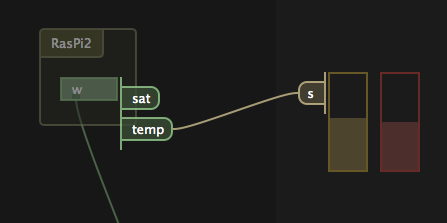
defaults {
  sat = 0.5,
  temp = 35,
}
These two parameters will then appear when changing connections for a control (see image below). Controls can have multiple “connectors” (like a pad does) or just a single one (like the slider shown here).
Once a control is connected to a node’s parameter, changing the value simply updates the value of the given variable in the Lua script, eventually triggering hooks like “param.changed”.
Connecting node parameters and controls.
Debug
Since the scripts run remotely, we cannot read the console for debug information, errors and printed values. We thus use a log window as shown bellow that gets all “print” “warn” and error notifications from remote processes:
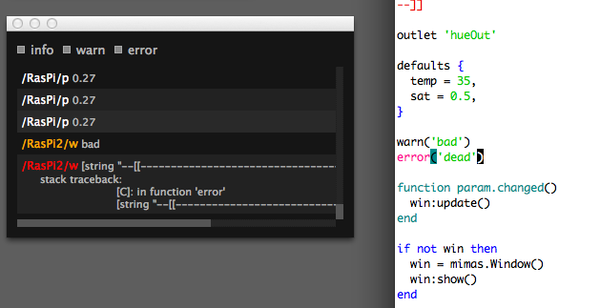
Informations, warnings and errors in the log window.
Clicking on a line in the log window will open the culprit at the concerned line in the text editor.
2012-03-04 - comments (0) -
Choosing an icon
To ease deployment and installation on mac os X, we have decided to create a single object (an application) which you can simply drag or give to friends. The application will install a few files to work from the command line but all the examples/documentation/libraries will be in the resource folder.
To build this application, we need an icon. Nicolas Joos has been working on an icon some time now and after settling for the four rounded shape, we have to build an “Application” icon.
Before diving into the sketches and propositions, here is what I think this icon should convey (most important first) :
- stability (we can rely on lubyk: it works)
- organic (“ecosystem”, sharing, alive)
- strangeness (arty)
Logo
Here were some of the propositions for the icon:
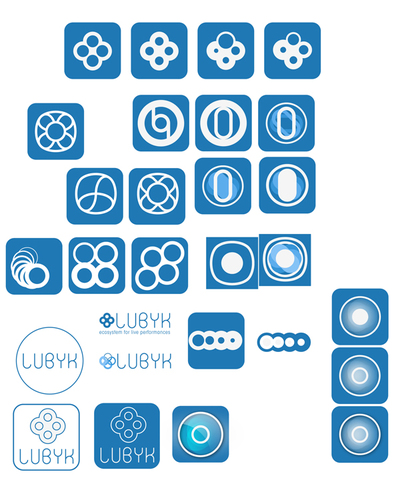
first ideas
developments over the ‘animal’ idea
We settled for the four circle shape (cells, ecosystem, proximity, etc):

logo and font choice
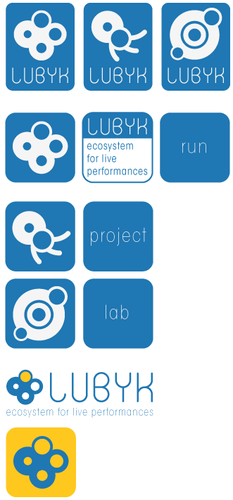
Application icon
Now that we have the logo, it is time to build the actual “app” icon: something that has to live in a dock, a filesystem, etc. We want an icon that stands out a little by it’s strangeness, something appealing but not too candy.
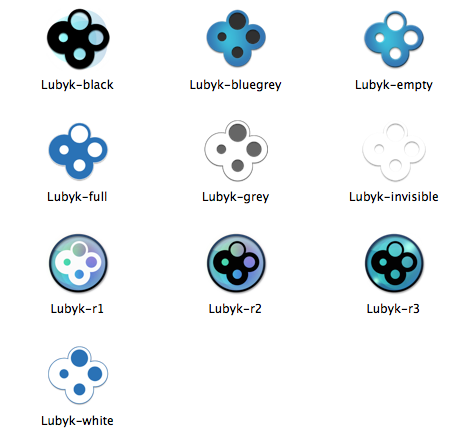
Here are the last contenders for the application icon in different contexts:
in a large filesystem icon view
small version when listed in the Finder

in the dock

in the application tab
Final choice
Not decided yet…
2011-09-03 - comments (2) -
Network loop to test latency
Now that I can create and remove links between processes, I thought of a little experiment:
What happens if I create a loop ?
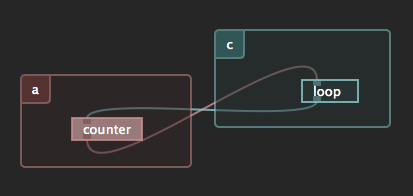
Here’s the content of both scripts:
counter
inlet('bang', 'Send next number on [bang].')
pass = outlet('pass', 'Increasing numbers [float]')

function inlet.bang(i)
  i = i + 1
  print(i)
  pass(i)
end

-- initiates the loop on script save
pass(0)
loop
inlet('bang', 'Send next number on [bang].')
pass = outlet('pass', 'Increasing numbers [float]')

function inlet.bang(i)
  i = i + 1
  pass(i)
end
results
I stated the script and I let it run for 30s. The counter reached 241’558 in these 30 seconds which means 8’050 messages per second.
The monitor (open during the test) shows 2.4Mb/s of data being transferred.
The same loop in a single process gives this result 1’298’724 (43’290 messages per second). Note that I had to change the “counter” so that it uses “app:post” to send in order to avoid a stack overflow error (in-process messaging is the same as a function call):
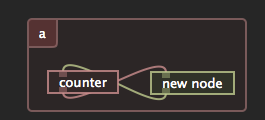
Updated “counter” inlet function:
function inlet.bang(i)
  i = i + 1
  print(i)
  app:post(function()
    -- post to avoid stack overflow
    count(i)
  end)
end

count(0)
network overhead
A local loop takes 23μ s with the post overhead. It takes 124μ s when going through the network. This is roughly 0.1 ms latency overhead. This is not too bad.
Another thing to take into account is that sending is a blind process unless feedback is setup. This means that the receiver should work faster or the incoming mailbox will grow. We could overcome this issue by providing other types of links if needed.
2011-06-29 - comments (0)
Highlights
-

received funding for interface
Funding from the Swiss Federal Office of Culture to write the graphical frontend to rubyk !
-

Switched to mono-threading
Moving from a global mutex to a global select/poll loop.